Preparing for the Perm Service Performing the proper steps before a perm service is as important as the process itself. In this video, Zotos Professional Educator Angie Ceja will take you through all the necessary first steps to ensure a successful perm. It all starts with a consultation and analysis of the client’s scalp and hair, understanding their desired results and whether they can be achieved based on the hair’s properties. To evaluate, observe the P.E.T. qualities: Porosity, Elasticity, and Texture. · Porosity is most important of the three, as it determines the hair’s ability to absorb liquid: the higher the porosity, the more damaged the hair. · Elasticity is the ability of the hair to stretch. When you stretch one strand of hair, if that strand quickly breaks it means there has been a loss of integrity and hair may be too compromised to perm. · Lastly, consider the hair’s Texture—fine, medium, or coarse—to understand the range of perming resistance from least to most resistant. Once you’ve decided to move forward after analyzing the hair, check the scalp to confirm the absence of abrasions or cuts, and drape the client with a water-resistant cape to protect from chemicals. (Don’t forget to protect yourself with an apron and gloves.) Gently cleanse hair with a clarifying shampoo. This will remove oil, debris, and product build-up that could prevent absorption of the waving lotion—but do NOT use conditioner before perming. Finally, rinse thoroughly, apply a towel, and re-evaluate to make a final determination on whether hair is perm-able. (You’ll need to re-assess because once hair is completely clean, its porosity and elasticity may change.) Important: it is critical to completely read the perming instructions printed on the inside of the perm box before you begin wrapping hair to confirm the manufacturer’s recommended instructions have not been updated to include important steps like a pre-treatment or leave-in pre-wrap. Remember to always perform perms in a well-ventilated area. Now you’re prepped to perm like a pro!
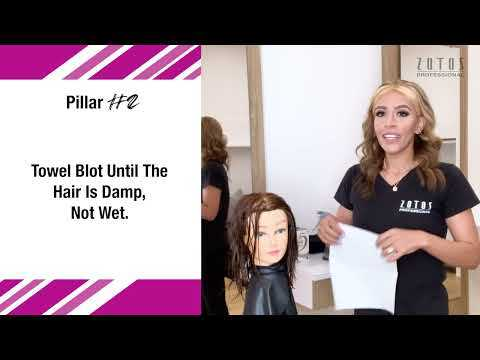
The Importance of Towel Blotting Why is towel blotting so important? The degree of dampness in your client’s hair prior to wrapping a perm is critical to the success of your service. Once you’ve shampooed and thoroughly rinsed the hair, towel blot until it’s damp—not wet. Hair that’s too saturated won’t be able to absorb enough waving lotion. Think of hair like a sponge: a wet sponge can’t soak up any more liquid because it is too full, but a damp one can. Once hair has reached desired dampness, it’s ready to be wrapped. It should remain damp throughout the wrapping process. If hair starts to dry out while wrapping, lightly mist with water.
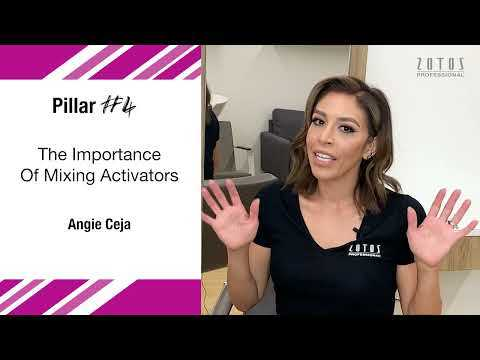
The Importance of Mixing Activators When an Activator is included with your Zotos perm, it’s important to mix it properly with the Waving Lotion in order to set the proper chemical reaction in motion. An Acid Perm includes: Waving Lotion, Activator and Neutralizer. The Activator must be shaken before it’s mixed into the Waving Lotion. Zotos Activators contain glycerol (made from glycerin) to help soften hair, which can stick to the sides of the bottle. Opaque and colored bottles make it difficult to tell if the solutions are thoroughly mixed and if the containers have been fully emptied, so be sure to shake the Activator well and squeeze the entire bottle into the bottle of Waving Lotion. When mixing solutions, pay attention to the timing. It’s very important to wrap the hair first, before mixing in the Activator. • The mixed solutions are only active for a short period of time. • For maximum benefit, wait until right before you apply to combine the formulas. While Acid Perms use Activators, Exothermic Perms (used for the most resistant hair types) use Thermolizers. These add heat to the Waving Lotion, and should be applied before the mixed solution cools down completely. Once again, timing is critical. It is important to follow the manufacturer’s directions to confirm: • Which bottles you shake before use • Which bottles are mixed together
The Importance of Applying Waving Lotion Slowly When the Waving Lotion is ready to apply, it’s important to: • Prep your client properly • Take your time applying the solution First, wrap a band of cotton around the hairline to protect the client’s skin. Avoid tucking the cotton under the perm rods, as it will absorb the lotion from the rods and create resistant areas. If any lotion does get on the cotton as you apply, remove it immediately and replace with a dry piece; leaving lotion-soaked cotton on the skin may cause irritation. If contact occurs with skin or scalp, blot (do not rub) with cotton soaked with cool water. Now it’s time to apply the Waving Lotion. For optimal control and flow, use a push pin to poke a hole in the bottle tip. When you’re ready to apply, be sure to go over each rod slowly to give the hair ample time to absorb the lotion. Go through one full application, then go back and do a second pass. When you’re finished, the hair should look shiny to indicate that it has absorbed enough lotion, but it should not drip. If dripping occurs, either the Waving Lotion was applied too quickly, or the hair was oversaturated with water. Rushing this step may result in the Waving Lotion dripping off the hair and onto the skin and floor. It may also result in an under-processed perm, as the hair will not have enough time to absorb the necessary amount of Waving Lotion. This is why we stress the importance of taking your time with the application process.
The Purpose of the Processing Cap Once the Waving Lotion has been applied and the perm is ready to process, it’s recommended that you put a plastic processing cap over the perm rods before starting the timer. Carefully place the processing cap over all the perm rods, and seal it tightly by twisting the edge and tucking it under the perm rods, or secure it with a small plastic clip. The purpose of the processing cap is to seal moisture in and keep air out, as air will slow down the process and diminish the strength of the perm solution, resulting in an uneven curl pattern. Always use the processing cap that is provided by the manufacturer. DO NOT USE shower caps, as the elastic can absorb the solution and cause irritation when sitting on the skin. If a larger processing cap is required for a perm using larger tools, a small, plain, unscented, non-recycled trash bag may be used in place of a processing cap.
The Importance of Not Taking a Test Curl if Directions State “Do Not Take a Test Curl” The purpose of a Test Curl is to check the development of the curl pattern during the perm process and make sure it’s complete before you move on to the next step. It is equally important NOT to Test Curl if the directions state NO TEST CURL REQUIRED. Some perms may not require a Test Curl for the following reasons: • Opening the airtight seal of the processing cap allows oxygen to enter and weakens the strength of the perm. • Modern perm formulas often contain moisturizers and conditioners to give optimal results. These add weight to the hair that gives a false reading if a Test Curl is taken. If the directions state TEST CURL REQUIRED: • Lift the processing cap • Release one (1) rod, unwinding 1-1/2 turns • Allow hair to relax • If the curl forms an “S” pattern and hair is separating into a ribbon effect, processing is complete NOTE: Be sure to test rods from different sections of the hair to ensure even curl development. If no “S” pattern is detected: • Rewind the Test Curl • Secure the processing cap • Re-test every 2-3 minutes using a different rod each time until processing is complete and the desired curl pattern is achieved Always follow the directions on Test Curls for each individual perm formula to achieve the best result.
The Importance of Rinsing The Waving Lotion Out of The Hair Prior to Neutralizing Once your client’s perm is fully processed, rinse out the Waving Lotion before applying Neutralizer. It’s important to rinse hair thoroughly using the warmest water temperature comfortable for your client. Set a timer for: • 5 minutes for short to chin-length hair • Add one (1) minute per inch of hair beyond that • Porous or long hair will require additional rinsing time and may take up to 10 minutes How can you tell if the hair is sufficiently rinsed? Smell: if you still smell a strong perm odor on your client’s hair, keep rinsing until the smell is powdery rather than chemical. Proper rinsing: • Removes perm odor • Eliminates dryness • Prevents major lightening of the hair color If you do not rinse properly and Waving Lotion remains in the hair when Neutralizer is applied, a chemical reaction occurs that can cause dryness and lighten color. The perm odor also gets sealed in the hair and will be activated whenever the hair gets wet from rain, sweat, or anything else. If Waving Lotion is not rinsed completely from the hair before the Neutralizer is applied, a chemical reaction could occur that can cause dryness and lightening of hair color, as well as seal in the odor of the perm. It is critical to rinse out the Waving Lotion thoroughly.
The Importance of Towel Blotting Before Neutralizing After the Waving Lotion has been fully rinsed from your client’s hair, it’s critical to towel blot each rod before applying the Neutralizer. The Waving Lotion disconnects the bonds that give hair its structure, while the Neutralizer reconnects them in their new formation. The Waving Lotion has an easier job breaking the bonds than the Neutralizer does rebuilding them in just 5 minutes. Therefore, you must create the optimal condition for the Neutralizer to absorb, which is achieved by properly towel blotting the hair to remove excess water. Once rinsing is complete: • Gently towel blot each rod/bender with a terry salon towel • Continue blotting until hair is dry to the touch (removing all excess water) • Doublecheck the dryness level by placing and holding a paper towel over the rods o If the rod pattern appears on the paper towel like an X-ray, then there is still too much water in the hair; continue towel blotting. * We do not recommend placing your client under a dryer to complete the drying process. The most common reason a perm needs to be redone is insufficient towel blotting before neutralizing; it is essential to follow this process for best results.
The Importance of Using All the Neutralizer The Neutralizer links hair’s bonds back together in its new permed structure; therefore, it’s important to apply it properly. Once the client’s hair is towel blotted until slightly damp: • Place cotton around the hairline • Shake the Neutralizer bottle gently before using • Use a T-pin to puncture the tip of the Neutralizer bottle o NOTE: A T-pin puncture allows for proper control and flow • Slowly apply Neutralizer to the rods • Thoroughly saturate each rod making sure it is evenly distributed • Save ½ oz (15 ml) for later use • Check directions for Processing Time; usually 5 minutes • Check to see if your perm has a mid-step. If so, this is when it would be applied. If towel blotting was done properly, the hair should absorb the same amount of Waving Lotion and Neutralizer. Therefore, if a full bottle of Waving Lotion was used, then you should also use a full bottle of Neutralizer. NOTE: Perms come with more Neutralizer than Waving Lotion. After the recommended neutralizing time: • Gently remove the rods o NOTE: Check to see if the perm instructions indicate to work any remaining Neutralizer through the hair, root-to-ends, for 1 minute • Remove the cotton • Rinse hair thoroughly with warm water for 3-5 minutes • Towel blot • If your perm includes a leave-in treatment, follow the directions and apply after rinsing. Always remember: The client must wait 48 hours before shampooing or conditioning; style as usual.